Ticka-ticka-ticka-ticka. Is that the sound your car makes when you're turning at low speeds with nearly full lock on? That's probably your CV joints, here's our guide to having them replaced.
First up: what is a CV joint?
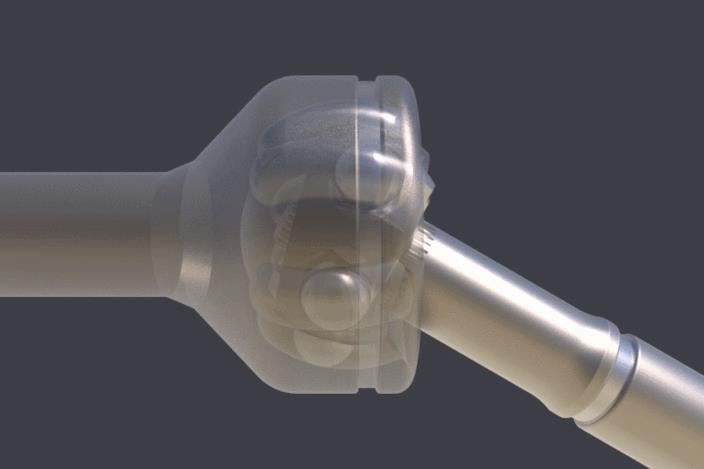
CV stands for Constant Velocity and the CV joint ensures that the wheels turn at a constant velocity, regardless of up and down movement in the car's suspension.
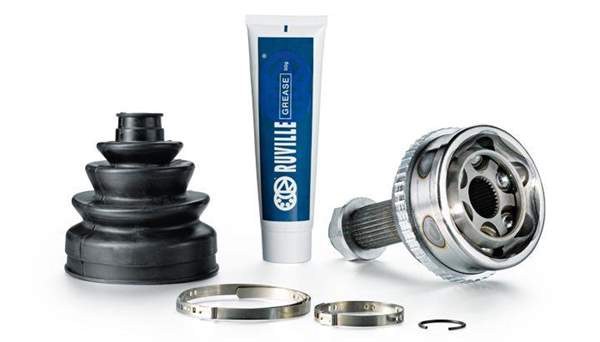
Typical CV joint Kit will include CV joint grease and a CV boot CV joints are found on either end of the shafts that drive the wheels (often referred to as 'half shafts' or drive shafts in front-wheel drive cars), regardless of whether the car is front, rear or all-wheel drive. The inner CV joints connect the shaft to the transmission, allowing movement between them, while the outer CV joints allow movement between the shaft and the wheels. 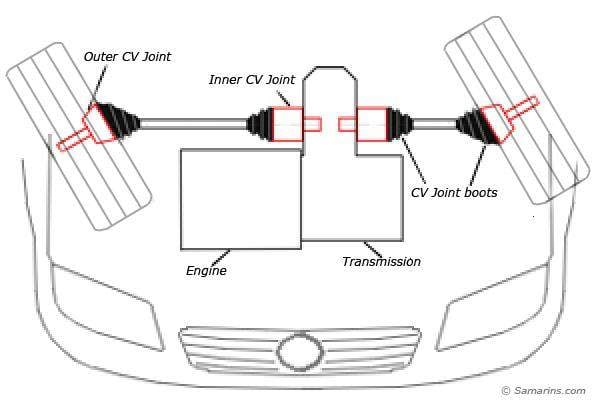
Although CV joints are found on the back wheels (on rear wheel drive and four wheel drive cars) they rarely fail, so here we're dealing mainly with CV joints on the front of front-wheel drive cars. The principle for changing them and their operation is the same, however. Likewise, the inner CV joints of a front-wheel drive car rarely cause problems, as they don't have to move anywhere near as much as the outer CV joints, which must accommodate the steering of the wheels as well as the drive force from the engine. So we'll focus on outer CV joints for the front axle in this article.
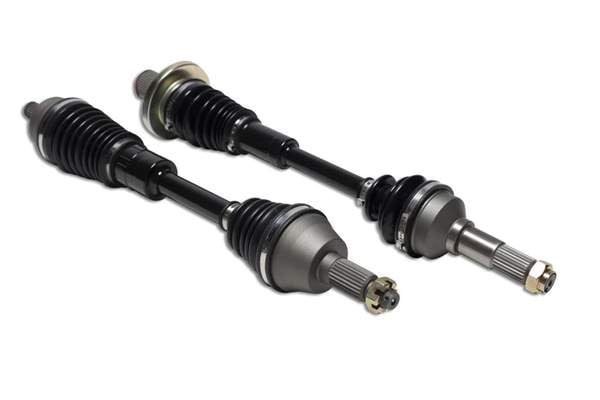
Complete driveshaft and CV joint assemblies
CV Joint Noise:
It doesn't take a trained ear to pick up on the tell-tale clicking sound a worn front CV joint makes, though as the degradation is gradual it may be a while before the driver notices it. Park up on even and smooth ground with plenty of space to spare. Turn the wheel fully in one direction and ease the car forward, gently accelerating while holding the wheel steady. Repeat this in the opposite direction as well. A worn CV joint will emit a characteristic clicking sound under these conditions and it should be replaced before there's any chance of it disintegrating completely. The noise gets louder as the component condition worsens.
CV joint replacement:
While replacing a CV joint isn't very complicated, there are a lot of components that need to be removed or undone to get at it. Ensure you have all the necessary tools and the correct replacement part before starting work, because once you begin, your car will be out of action until the component is back where it should be.
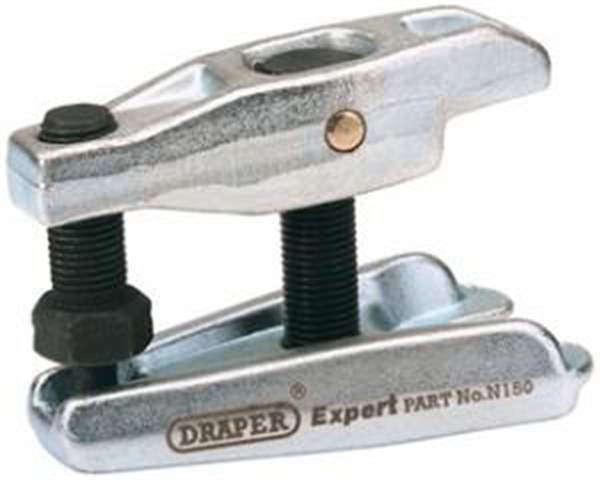
Safety first: Take the keys out of the ignition and disconnect the battery to prevent any chance of the car being started accidentally. Unless you have the luxury of a car lift you'll need to jack the car up and ensure that it's adequately supported by axle stands (on smooth, level ground) with the correct weight rating on them. Remove the wheel, then, if fitted, prise off the dust cap at the centre of the hub. There's usually a split pin next, then a large hexagonal nut to remove. A powerful pneumatic or electric impact wrench should make short work of this, but if you don't have one to hand, a long socket bar and a good quality socket will be required - they can be extremely tight. It'll be necessary to stop the axle from turning to loosen the nut. One way is for a buddy to push the brake pedal in the car. Be aware that, on the left side of the car, the threads may be 'left-handed', which means you turn it clockwise to loosen it. A workshop manual is invaluable for jobs such as this to make your life easier. Once the nut and the washer behind it have been removed, it's usually time to dismantle the lower ball joint. This can be a difficult job in itself and its complexity will vary from car to car. A ball joint splitter will certainly help here. Once it's prised out of place, the steering can be manually turned to its extremity so you can see the rear of the wheel carrier. Assuming it's the outer CV joint being replaced (it usually is), it's best not to remove the inner CV joint from the transmission if at all possible. It could result in gearbox oil spilling out. It might be a good idea to have a drain pan at the read just in-case that does happen Most of the time, it will be necessary to lever the CV joint out of the hub, as it becomes seized over time. 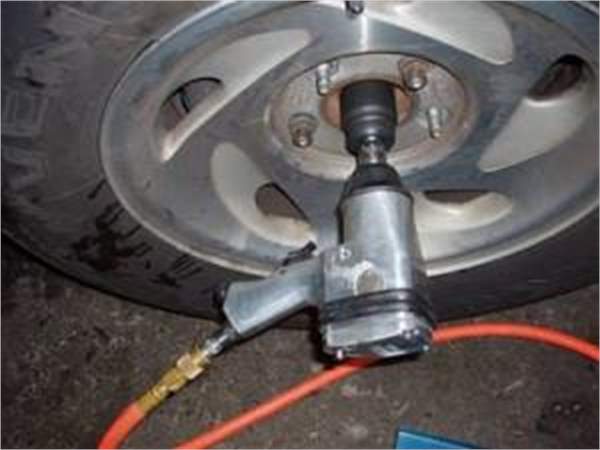 It's also possible to hammer it out from the thread side though, as this damages the threads, only resort to this method if you're sure it is not being used again. Once the CV joint is free of the hub it's time to release the two band clips that hold the rubber CV boot in place over the CV joint and slide the boot back along the shaft out of the way. Then the only thing holding the CV joint to the drive shaft is a circular clip, which may not be visible. Tapping the outer edge of the CV joint away from the transmission should be enough to release it. Careful you don't drop it on your toes, as it's heavy! The next few steps are crucial and easy to overlook. First of all, remove the old rubber boot and any remnants of the band clips that held it in place. A CV joint replacement kit should include new band clips, a new rubber boot, grease and the CV joint itself. Slide the smaller of the two band clips onto the drive shaft, followed by the smaller end of the rubber boot. Open the grease pouch and squeeze it into the CV joint before fitting it to the drive shaft and tapping it with sufficient force for it to slide past the internal clip. You'll know this is done when it's not possible to remove the CV joint by hand. Do not directly hit the threads of the new CV joint with a hammer or any other tool. If necessary, wind the large nut on to protect the threads as you tap the end of the CV joint. Slide the rubber boot in place over the CV joint and tighten up the inner band clip over the drive shaft. Add the outer band clip and tighten it up. Swivel the CV joint to make sure it can move smoothly in all directions before sliding it back into the wheel carrier. Then it's just a case of reversing the process, ensuring you replace the split pin and all fixings for the ball joint and hub. Make sure you pay attention to any torque settings, in-particular the hub nut and wheel nuts - again a Haynes manual can be an invaluable companion! Once the car has its wheel on and has been lowered to the ground, drive away slowly at first and test the steering to full lock at low speeds to ensure everything is back to normal and the noise has gone away. Note that it's not possible to replace just the CV joint on some cars - the whole shaft with both inner and outer CV joints may be required, adding to the expense and labour. Extra steps needed for that include prising the inner CV joint out of the transmission, carefully catching the oil that may spill out in the process. It's important to top up the gearbox oil again once the new CV joint is back in place.
CV Joint Replacement Cost:
Cv joints are not particularly expensive items to buy and can range from as little as £20 up to roughly £150. Depending on the car, the labour charge to fit them shouldn't be that much either. Bank on half an hour to an hour per side to replace.
CV Boots:
CV joints usually fail because the rubber boot that surrounds them gets damaged. This keeps the necessary grease in place and moisture and dirt out of the CV joint. These can tear and that will eventually lead to CV joint failure (a torn or damaged CV boot is an instant NCT/MOT failure by the way)
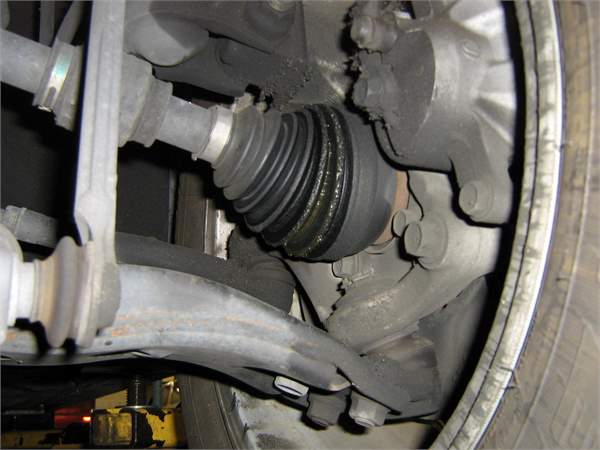
If you spot any damage on the CV joint boot, it's best to have it (just the rubber boot) replaced as soon as possible, even if there is no CV joint noise. This could save you hundreds in the long run, though it's still almost as much work to replace the boot as it is the whole CV joint. A CV joint boot kit will include the rubber boot, new band clips and a pouch of grease. Like this guide? Why not check out our other DIY guides here