For the most discreet means of installing your dash camera, hardwiring is by far the most appropriate method. The cable can annoy drivers if they are using the cigarette lighter input, this also means you can’t charge your phone! Hard wiring a dash cam is a job you can do yourself if you have the know how and patience to do so. If you feel you are not able to hardwire it yourself go to a professional who is comfortable working with electrics. The process usually takes 30 minutes to complete depending on the car. You will also have to add on a few more minutes for fitting if you have a front and rear dash cam. The following steps will take you through the process of a flawless installation.
Dash Cam Fitting:
-
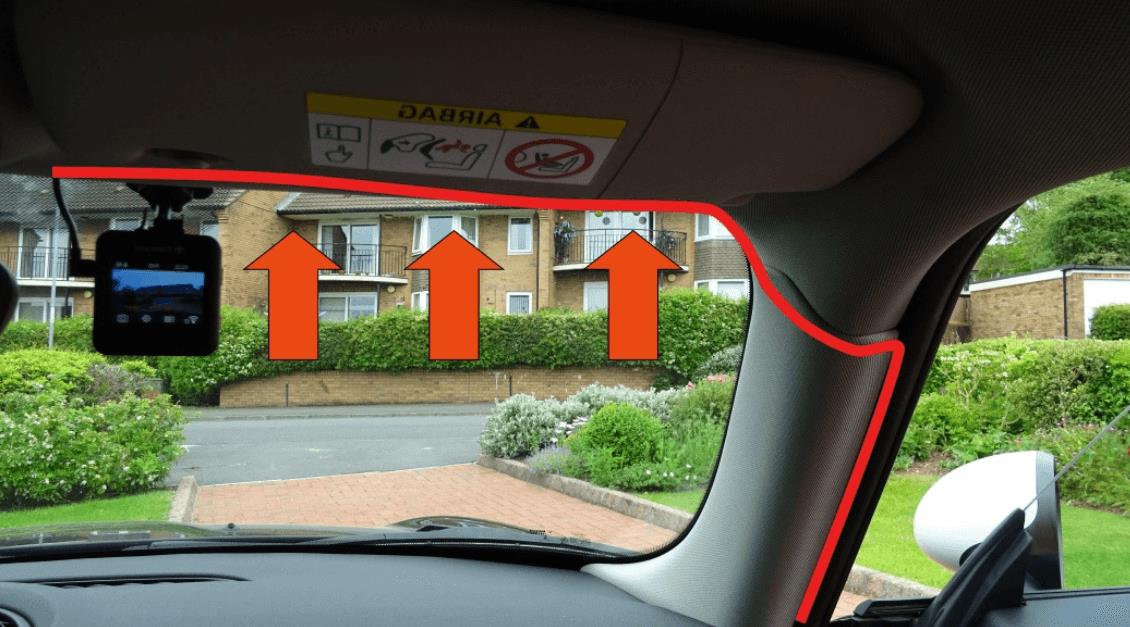
Position your dash cam in a suitable location where it does not impede your view of the road ahead. Usually behind the rear view mirror is a good location in most instances. Once you are happy with the positioning we can then move on to locating the power source.
-
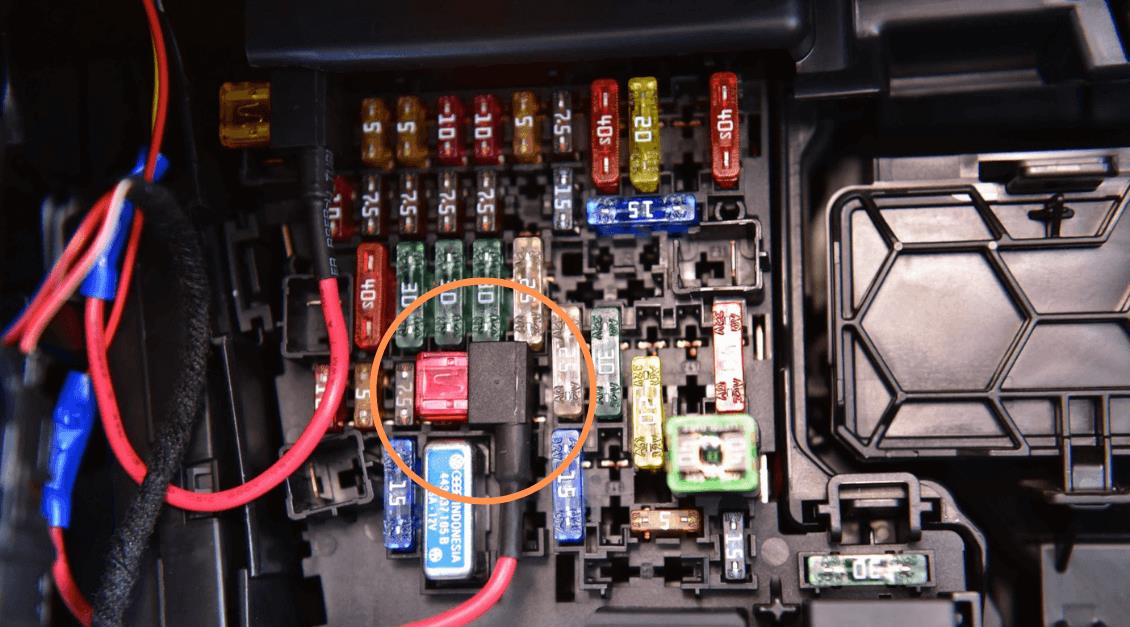
The fuse box can be located at the front of the car or the rear. If your is a the rear of the car it will take you slightly longer to install due to the increase in the time it will take to run the cables all the way back the length of the car. If you are struggling to locate the fuse box its worth having a look at your car manual to find exactly where it is.
-
After you’ve found the fuse box you can start to lay out your power supply. We constantly get asked how to hide dash cam wires when installing. The short answer is to run them along the roof liner removing them from view. Once you are happy that the cables are out of view you can move on to running the cable to the fuse box. In most cases, you should be able to force the cable behind the roof liner and arches. Depending on the car you may have to remove the trims to get the wires to stay in place.
-
The fuse box has multiple inputs that are not in use. We first need to decide whether we want the dash cam to turn on/off automatically or to be always on. To find which fuse to use we can use a circuit tester, this will show you the fuses that receives power when the car is turned on and the ones that receive power when the car is turned off.
Pros of hardwiring:
- Clean and discreet fitting
- Leaves the cigarette input free to use
- The device is always connected no need to even think about it.
Cons of hardwiring:
- May need professional assistance to fit
- Takes some time & patience.
If you plan on using the park mode on your dash camera, we recommend getting a battery drainage protector. This device protects your battery from draining while your camera is in use. As the car is not running the dash cam is using the power that is left in the battery. Similar to leaving your car lights on overnight, it uses up all the power leaving you with a flat battery. This is just something to consider if you are buying a dash cam with this feature.
We are currently stocking a wide range of dash cam brands which include Blackvue, Thinkware and Nextbase. Each brand has there very own hardwiring kit, making life that little bit easier for you. These kits have all the necessary cables to piggyback off the current fuse box of any vehicle that uses either standard ATO/C or smaller ATM fuses. If you are looking to purchase the wiring you can do so here.
So there you have it, a step by step guide through the dash cam installation process of hardwiring a dash cam. We hope this article has helped you gain a better understanding. All these dash cams make for a safer driving experience. If you having questions about, car accessories, simply send us an email at [email protected] and our team will help you to get Car parts for less. We will help you and we'll make sure that you're getting the best price every time!
Until next time,
MicksGarage.com the Car Parts Experts.


Leave a Reply